Posted on

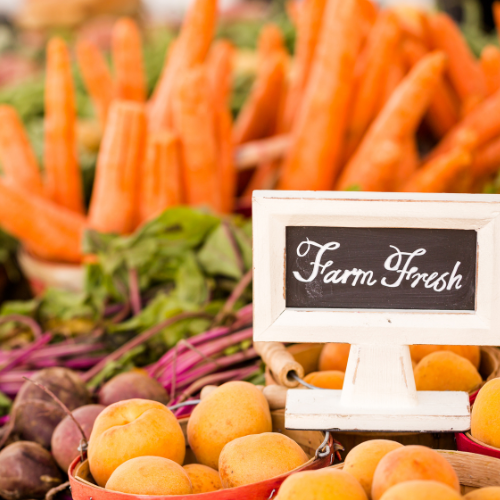
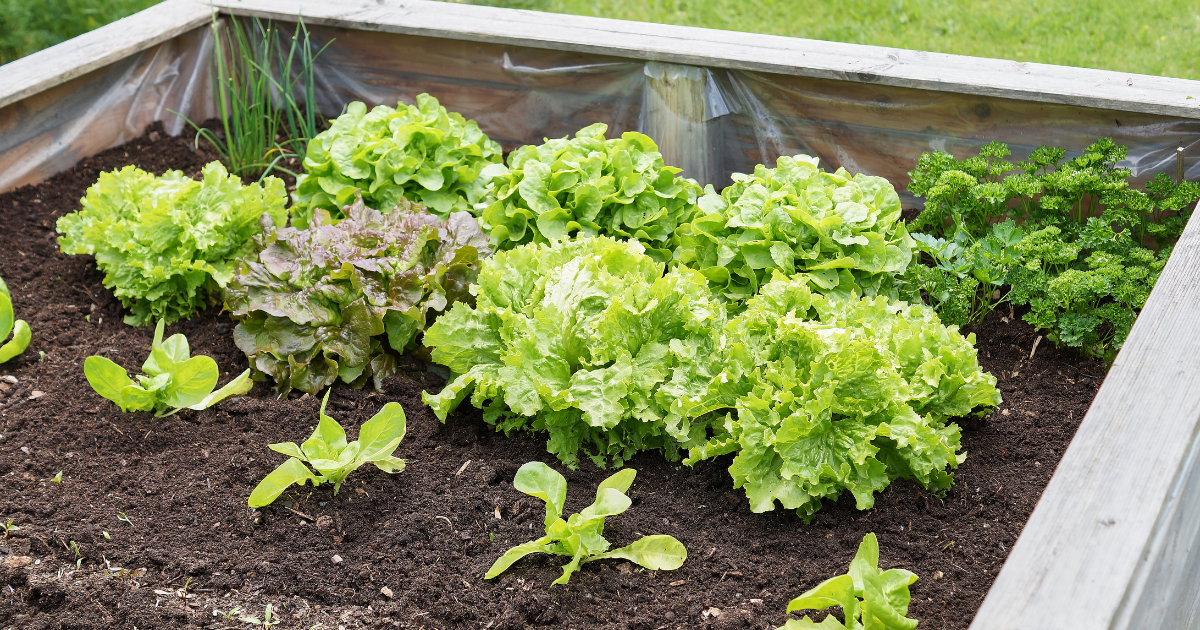
A Guide to Crafting Your Own Sustainable Backyard Garden

Welcome to becoming a homesteader right in your own backyard! It’s time to embrace the sustainable living trend with a project that benefits your health, your wallet, and Mother Earth herself no matter the size of your yard. Creating a sustainable backyard garden is not just a rewarding pastime; it’s a step towards self-sufficiency and environmental responsibility. Whether you’re a culinary enthusiast seeking the freshest ingredients for your Rustic Summer Pasta or a nature lover aiming to reduce your carbon footprint, this guide will walk you through the essentials of crafting a garden that’s both bountiful and eco-friendly.

Understanding Sustainable Gardening

Sustainability in gardening is about more than just growing plants; it’s an approach that considers the ecological cycle and works in harmony with it. A sustainable backyard garden not only provides a source of organic produce but also contributes to the wellbeing of the local ecosystem. Here are some principles to keep in mind:

  • Utilizing organic, non-GMO seeds ensures the health of your soil and produce.
  • Implementing companion planting can naturally ward off pests and improve plant health.
  • Conserving water with methods like drip irrigation or rainwater harvesting reduces waste.
  • Composting kitchen scraps turns waste into valuable organic fertilizer.
  • Recycling garden waste minimizes landfill contributions and enriches your soil.

Designing Your Garden Layout

The design of your sustainable backyard garden should be a reflection of your space, sunlight availability, and the types of food you enjoy in your recipes. Consider raised beds to improve drainage and prevent soil compaction, and always select a spot with ample sunlight—at least six hours a day for most vegetables. When planning, think about the seasonality of your crops to maintain a year-round harvest that can be showcased in dishes such as Mediterranean Stuffed Chicken or Spring Vegetable Ragout.

Companion Planting

Companion planting is a time-honored method to maximize space and enhance your garden’s productivity. By planting certain combinations, you can deter pests, attract pollinators, and even improve the flavor of your produce. For example:

  1. Plant basil near tomatoes for a natural pest deterrent.
  2. Grow marigolds among your vegetables to attract pollinators and repel nematodes.
  3. Nasturtiums can be used as a trap crop for aphids, protecting other plants.

Maintaining Your Garden

Once your garden is planted, regular maintenance is key to its sustainability. This includes mulching to retain moisture, pruning to encourage growth, and rotating crops to prevent soil depletion. Being vigilant about organic pest control methods will help keep your plants healthy without the need for harmful chemicals. Additionally, integrating a community-supported agriculture (CSA) mindset, where you share your surplus with neighbors or local food banks, can foster a sense of community and reduce food waste.

Water Conservation

Water is a precious resource, and conserving it is a cornerstone of sustainable gardening. Techniques such as drip irrigation deliver water directly to the plant roots, minimizing evaporation and runoff. Collecting rainwater in barrels is another effective strategy, and it’s also better for your plants as rainwater is naturally soft and free of chlorine and other chemicals found in tap water.

In conclusion, establishing a sustainable kitchen garden aligns perfectly with our ethos of “Bringing The Farm To You”. It’s a step towards a healthier lifestyle and a commitment to preserving our planet. By incorporating these sustainable practices, you can enjoy the freshest ingredients right from your garden to your table, complementing the delicious offerings found in our marketplace and enriching the recipes shared within our food-oriented community. Happy gardening!
Posted on

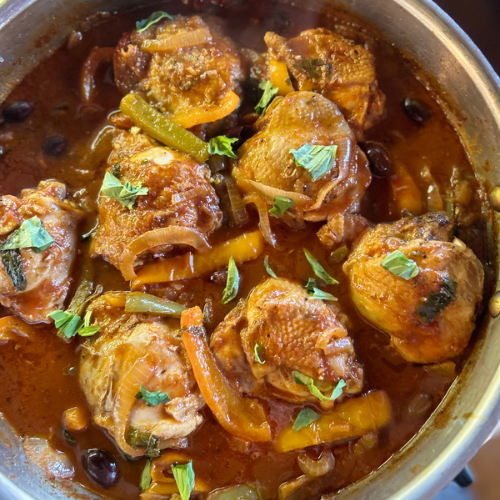
Chicken Cacciatore

Learn how to make authentic chicken cacciatore, a classic Italian dish, with vegetables and white or red wine.

Ingredients

  • 8 – Bone-In Chicken Thighs
  • 2 – Bell Peppers, thinly sliced
  • 1 – Yellow Onion, thinly sliced
  • 3 – Garlic Cloves, minced
  • 3/4 white or red wine
  • 2 Cups Marinara or Favorite Pasta Sauce
  • 2 Sprigs Rosemary
  • 1/2 Tsp. Oregano
  • 6 – Basil Leaves, torn
  • 1 dozen Kalamata Olives (optional)
  • 1 Tbsp Capers (optional)
  • salt and pepper to taste

Instructions for making Chicken Cacciatore

  1. Pre-heat oven safe skillet on medium/high heat with 2 tablespoons olive oil.
  2. Pre-heat oven to 350 degrees.
  3. Season thighs with salt and pepper.
  4. Once skillet is warmed, place thighs skin side down until browned (5-7 minutes).
  5. Flip and brown for another 7 minutes.
  6. Place thighs on plate and drain pan of all but 1 tablespoon of oil/fat.
  7. Add bell peppers and onion to pan and sprinkle with salt and pepper. Saute until softened and slightly brown and then add in garlic.
  8. Deglaze pan with 3/4 cup red or white wine.
  9. Add 2 cups marinara (or favorite pasta sauce), rosemary, oregano, basil. kalamata olives, and capers.
  10. Add thighs and juiced back into the pan. Evenly coat with sauce in the pan.
  11. Place lid or foil on pan and place in a 350 degree oven for approximately 25 minutes and/or internal temperature of chicken reaches 165.

*You could serve with pasta or over cheesy soft polenta.

Find more delicious chicken dinner recipes:

If you try this recipe and love it, I would appreciate if you could come back, commented on the post, and give it 5 stars! Thanks.

Chicken Cacciatore

Learn how to make authentic chicken cacciatore, a classicItalian dish, with vegetables and white or red wine.
Prep Time 15 days
Cook Time 30 days
Total Time 45 minutes
Course Dinner
Cuisine Italian
Servings 8

Ingredients
  

  • 8 Bone-In Chicken Thighs
  • 2 Bell Peppers thinly sliced
  • 1 Yellow Onion thinly sliced
  • 3 Garlic Cloves minced
  • 3/4 cup White or Red Wine
  • 2 cup Marinara or Favorite Pasta Sauce
  • 2 sprigs Rosemary
  • 1/2 tsp Oregano
  • 6 leaves Basil torn
  • 1 dozen Kalamata Olives optional
  • 1 tbsp Capers optional
  • salt and pepper to taste

Instructions
 

  • Pre-heat oven safe skillet on medium/high heat with 2 tablespoons olive oil.
  • Pre-heat oven to 350 degrees.
  • Season thighs with salt and pepper.
  • Once skillet is warmed, place highs skin side down until browned (5-7 minutes).
  • Flip and brown for another 7 minutes.
  • Place thighs on plate and drain pan of all but 1 tablespoon of oil/fat.
  • Add bell peppers and onion to pan and sprinkle with salt and pepper. Saute until softened and slightly brown and then add in garlic.
  • Deglaze pan with 3/4 cup red or white wine.
  • Add 2 cups marinara (or favorite pasta sauce), rosemary, oregano, basil. kalamata olives, and capers.
  • Add thighs and juices back into the pan. Evenly coat with sauce in the pan.
  • Place lid or foil on pan and place in a 350 degree oven for approximately 25 minutes and/or internal temperature of chicken reaches 165.
Keyword Dinner, Italian
Posted on

Organic or Conventional: Decoding Food Labels for Healthier Choices

When strolling through the grocery store, you’re presented with an array of labels proclaiming their contents to be “natural,” “organic,” “non-GMO,” and more. But what do these labels actually mean for your health and the environment? Understanding the nuances of organic versus conventional food labels is vital for making informed decisions that align with your dietary preferences and values. Let’s peel back the layers of these terms to ensure that you can select the most nutritious and sustainable options for your table.

Defintion of Organic

Organic produce and other ingredients are grown without the use of synthetic pesticides, fertilizers, genetically modified organisms (GMOs), and they are not subjected to irradiation or industrial solvents. The U.S. Department of Agriculture (USDA) certifies products as organic if they meet these stringent guidelines. According to the USDA, organic farming practices are designed to be environmentally friendly, promoting biodiversity and soil health, and reducing pollution and the use of water.

Label Variations


100% Organic: These products are made entirely with certified organic ingredients and methods.
Organic: Products with at least 95% organic ingredients can use this label.
Made with Organic: Products that contain at least 70% organic ingredients may state “made with organic ingredients” on the label, but cannot use the USDA organic seal.


Understanding Conventional Food


Conventional foods are the more common products found in grocery stores. They are produced using standard farming practices that often include synthetic chemical inputs such as pesticides and fertilizers. Conventional farming may also utilize GMOs to increase yield or resistance to pests. While these methods can make food more abundant and less expensive, there are concerns about the long-term effects of these practices on health and the environment. The Environmental Working Group, for instance, publishes a list of produce with the highest pesticide residues, known as the “Dirty Dozen,” to help consumers make healthier choices while shopping.

Reading Between the Lines


Understanding food labels goes beyond recognizing organic and conventional designations. Terms like “free-range,” “grass-fed,” and “hormone-free” often appear on packaging, and they can be confusing. For example:

Free-range: This indicates that the livestock had access to the outdoors, although the time spent outside may vary.
Grass-fed: Animals were fed grass for a significant portion of their lives, which can lead to leaner meat with potentially higher levels of certain nutrients.
Hormone-free: Animals were not given hormones to promote growth, which is especially common in poultry and dairy products.
While these labels can guide your choices, it’s crucial to understand their definitions and limitations. The Food and Drug Administration (FDA) and USDA provide guidelines and regulations for labeling, ensuring that consumers have access to reliable information about their food.

Empowered Shopping


Making sense of food labels empowers you to choose foods that are not only delicious but also align with your values, whether that’s supporting sustainable farming practices or selecting foods that are free from certain chemical inputs. At our marketplace, we’re committed to bringing the farm to you, offering fresh ingredients and meals that adhere to high standards of quality and sustainability. Our recipes, like Rustic Summer Pasta and Peach Crisp Chia Pudding, feature wholesome ingredients that celebrate the flavors of the season straight from the fields to your fork.

As you navigate the grocery aisles or browse our online selection, remember the importance of understanding food labels. It’s more than just making a choice between organic or conventional; it’s about making informed decisions that contribute to your health, your family’s well-being, and the planet. So next time you’re in the market for a fresh meal or pantry staple, consider the journey it’s made to your plate, and choose confidently knowing you’re well-versed in the language of food labeling.

Posted on

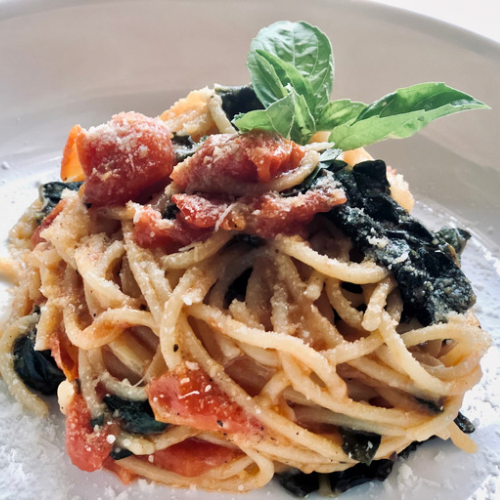
Rustic Summer Pasta

Rustic Summer Pasta

To me, summer is here when there is an abundance of fresh vegetables available to pick from and toss is in a quick and simple pasta dish and call it a meal. This Rustic Summer Pasta is so versatile you could throw in almost any vegetable and it would be delicious.

Ingredients:

Directions:

  1. Bring a large pot of water to a boil.
  2. Heat 2 tablespoons extra virgin olive oil in pan over medium/high heat and add minced garlic for 1 minute (do not brown).
  3. Add chopped Tuscan kale, approximately 1 minute.
  4. Add cherry tomatoes, salt, and pepper at medium heat and place lid on for 5-10 minutes.
  5. Once tomatoes break down, smash with the back of a wooden spoon.
  6. Add artisanal pasta to boiling water and cook according to package. *Reserve 1 cup of pasta water for sauce. For Italians, the pasta water is liquid gold. The secret to a good sauce.
  7. Add pasta a minute before al dente along with reserved pasta water, turn heat to high for 1 minute.
  8. Add 2 tablespoons olive oil and stir pasta quickly.
  9. Add salt, black pepper, torn basil, and Parmesan Reggiano to taste.
  10. Enjoy!

Rustic Summer Pasta

Rustic Summer Pasta

This Rustic Summer Pasta puts everything that's tasty about summer in one bite! It's simple enough that you can change it up and add whatever summer vegetables you have growing in your garden or local farmer's market!
Prep Time 10 days
Cook Time 20 days
Total Time 30 days
Course Dinner, Main Course, Pasta
Cuisine Italian
Servings 6 servings

Ingredients
  

  • 2 garlic cloves diced
  • 4 tbsp olive oil extra virgin
  • 1 cup Tuscan kale chopped and stems removed
  • 2 cups cherry tomato
  • 1/2 lb artisanal pasta
  • 1 handful basil sweet
  • 1/2 cup Parmesan Reggiano cheese grated
  • salt and pepper to taste

Instructions
 

  • Bring a large pot of water to a boil.
  • Heat 2 tablespoons extra virgin olive oil in pan over medium/high heat and add minced garlic for 1 minute (do not brown).
  • Add chopped Tuscan kale, approximately 1 minute.
  • Add cherry tomatoes, salt, and pepper at medium heat and place lid on for 5-10 minutes.
  • Once tomatoes break down, smash with the back of a wooden spoon.
  • Add artisanal pasta to boiling water and cook according to package. *Reserve 1 cup of pasta water for sauce.
    ***For Italians, the pasta water is liquid gold. The secret to a good sauce.
  • Add pasta a minute before al dente along with reserved pasta water, turn heat to high for 1 minute.
  • Add 2 tablespoons olive oil and stir pasta quickly.
  • Add salt, black pepper, torn basil, and Parmesan Reggiano to taste.
Keyword Handmade pasta, Little Lost Kitchen, summer pasta
Posted on

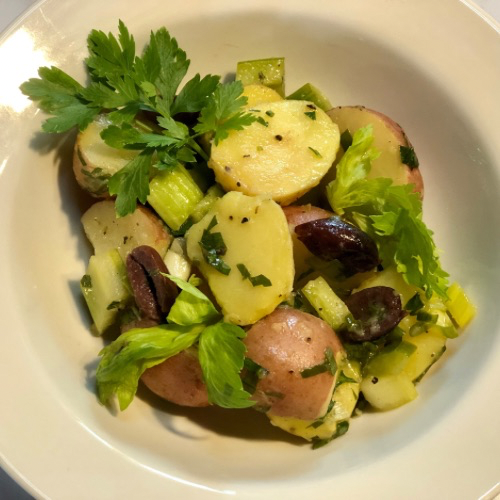
Italian Potato Salad

This light and fresh Italian Potato Salad is the perfect side dish for dinner, a BBQ, or your next family get together.

If I am being honest, potato salad has never been one of the items I run to at a BBQ or to add as a side dish to our dinner rotations at home. The creaminess of a traditional potato salad has always left me feeling heavy and ready for a nap. I enjoy eating potatoes and decided it was time to try out something new so that I would enjoy eating them as a side salad that was light instead of creamy.

This Italian Potato Salad is super simple with light ingredients for the vinaigrette and filled with fresh ingredients from your local farmers market, garden, or grocery store. This side dish can be served immediately or let to rest in the refrigerator overnight to allow the flavors to come together. It tastes even better the next day!

Ingredients needed for Italian Potato Salad:

  • Yukon Gold Potato
  • 1 Bunch Green Onion
  • Celery
  • Radish
  • Kalamata Olives
  • Salt
  • Pepper
  • Italian Parsley
  • Parsley Leaves
  • Red Wine Vinegar
  • Lemon Juice
  • Honey
  • Salt
  • Olive Oil
  • Dijon Mustard
  • Additional flavor if desired: thyme, oregano, basil

How to make Italian Potato Salad:

  1. Wash potatoes and transfer to a large pot. Fill pot with cold water, covering the potatoes by 1 inch.
  2. Bring the potatoes to a boil over high heat and then lower to a simmer. Cook until potatoes are fork tender but with a slight firmness, about 20-25 minutes.
  3. Drain and let potatoes cool to room temperature.
  4. In a large bowl, whisk together red wine vinegar, lemon juice, honey, salt, olive oil, and Dijon mustard.
  5. Once cooled, cut the potatoes into fourths and transfer to a serving dish. Add green onion, chopped celery, sliced radishes, pepper, Kalamata olives and toss with vinaigrette and chopped Italian parsley. Garnish with fresh parsley leaves.

Italian Potato Salad

This light and fresh Italian Potato Salad is the perfect side dish for dinner, a BBQ, or your next family get together.
Prep Time 30 minutes
Cook Time 30 minutes
Course Side Dish
Cuisine Italian
Servings 6 People

Ingredients
  

  • 2 lb Yukon Gold Potato
  • 1 Bunch Green Onion
  • 1/2 Cup Celery chopped
  • 4-6 Thinly Sliced Radish
  • 2 Dozen Kalamata Olives Halved
  • 1/4 tsp Pepper
  • 1/4 cup Italian Parsley roughly chopped

Vinaigrette

  • 1/3 cup Red Wine Vinegar
  • 1 tsp Lemon Juice
  • 1 tsp Honey
  • 1 tsp Salt
  • 2/3 cup olive oil
  • 1 tsp Dijon Mustard

Instructions
 

  • Wash potatoes and transfer to a large pot. Fill pot with cold water, covering the potatoes by 1 inch.
  • Bring the potatoes to a boil over high heat and then lower to a simmer. Cook until potatoes are fork tender but with a slight firmness, about 20-25 minutes.
  • Drain and let potatoes cool to room temperature.
  • In a large bowl, whisk together red wine vinegar, lemon juice, honey, salt, olive oil, and Dijon mustard.
  • Once cooled, cut the potatoes into fourths and transfer to a serving dish. Add green onion, chopped celery, sliced radishes, pepper, Kalamata olives and toss with vinaigrette and chopped Italian parsley.
    Garnish with fresh parsley leaves.

Notes

Additional flavor if desired: 1/4 tsp thyme, oregano, or basil.
Keyword Gathering, Italian, Side Dish
Posted on

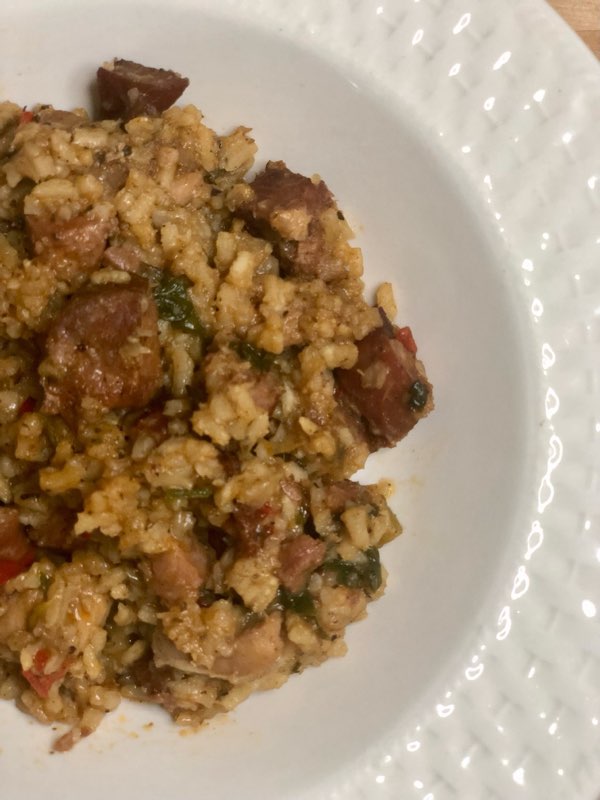
Cajun Jambalaya

Ingredients:

  • 2 lbs. boneless, skinless chicken thighs, cut into 1⁄2 inch pieces
  • 2 tsp. Cajun spice, plus more to taste (I use Tony Chachere or Slap Ya Mama)
  • 4–5 Tbsp. olive oil
  • 1 cup chopped onion
  • 3⁄4 cup celery, chopped
  • 1⁄2 cup chopped green bell pepper
  • 2 large cloves garlic, minced
  • 2 bay leaves
  • 1⁄2 tsp. thyme
  • 11⁄2 cups long-grain white rice, uncooked
  • 1 lb. andouille or smoked sausage, sliced 1⁄4 inch thick
  • 1⁄4 lb. diced smoked ham
  • 3 cups low sodium chicken broth
  • 1⁄2 lb. medium peeled and deveined shrimp
  • 1⁄4 cup finely chopped scallions
  • 1⁄4 cup finely chopped flat-leaf parsley

Instructions:

  1. Season the chicken with 1 tsp. Cajun spice. In a large, heavy pot or Dutch oven over medium heat, add the oil. When the oil is hot, add the chicken in 2 batches and cook until just cooked through and lightly browned; set aside.
  2. In the same pot, brown the sausage. Remove and set aside.
  3. Add the onion, bell pepper, minced garlic, thyme and bay leaves in 2 Tbsp. of remaining oil. Season lightly with Cajun spice. Cook over medium heat, stirring occasionally, until the onions are golden brown, about 8–10minutes.
  4. Add the rice, stirring for a couple minutes until the rice is coated with oil and all is well mixed.
  5. Return the chicken, sausage and the ham to the pot, add the stock along with a teaspoon Cajun spice, stir and bring to a simmer. Reduce the heat to low, cover, and cook until stock is absorbed, about 30 minutes.
  6. Lightly season the shrimp and stir into the pot in the last 10 minutes of cooking.
  7. Fluff rice with a fork and taste for salt. Remove the bay leaves. Just before serving, stir in the scallions and parsley. Serve with hot sauce.

Cajun Jambalaya

John Caravelli
This Cajun Jambalaya is the perfect dish to pair with Muffuletta Sandwich for your Mardi Gras celebration or to enjoy anytime of the year especially in those winter months.
Cook Time 1 hour 30 minutes
Course Dinner
Cuisine Cajun
Servings 6 People

Ingredients
  

  • 2 lb. boneless, skinless chicken thighs cut into ½ inch pieces
  • 2 tsp  Cajun spice, plus more to taste I use Tony Chachere or Slap Ya Mama)
  • 4-5 tbsp olive oil  extra virgin
  • 1 cup onion chopped
  • 3/4 cup celery chopped
  • 1/2 cup green pepper chopped
  • 2 large garlic cloves minced
  • 2 bay leaves
  • 1/2 tsp thyme
  • 1 1/2 cups long-grain white rice, uncooked uncooked
  • 1 lb. andouille or smoked sausage sliced ¼ inch thick
  • 1/4 lb. smoked ham diced
  • 3 cups chicken broth
  • 1/2 lb. medium shrimp peeled and deveined
  • 1/4 cup scallions finely chopped
  • 1/4 cup flat-leaf parsley finely chopped

Instructions
 

  • Season the chicken with 1 tsp. Cajun spice. In a large, heavy pot or Dutch oven over medium  heat, add the oil. When the oil is hot, add the chicken in 2 batches and cook until just cooked  through and lightly browned; set aside.
  • In the same pot, brown the sausage. Remove and set aside.
  • Add the onion, bell pepper, minced  garlic, thyme and bay leaves in 2 Tbsp. of remaining oil. Season lightly with Cajun spice. Cook  over medium heat, stirring occasionally, until the onions are golden brown, about 8–10  minutes.
  • Add the rice, stirring for a couple minutes until the rice is coated with oil and all is  well mixed.
  • Return the chicken, sausage and the ham to the pot, add the stock along with a  teaspoon Cajun spice, stir and bring to a simmer. Reduce the heat to low, cover, and cook until  stock is absorbed, about 30 minutes.
  • Lightly season the shrimp and stir into the pot the last 10 minutes of cooking.
  • Fluff rice with a fork and taste for salt. Remove the bay leaves. Just before serving, stir in the  scallions and parsley. Serve with hot sauce.
Keyword Comfort Food, Dinner, Fat Tuesday, Jambalaya, Mardi Gras
Posted on 1 Comment

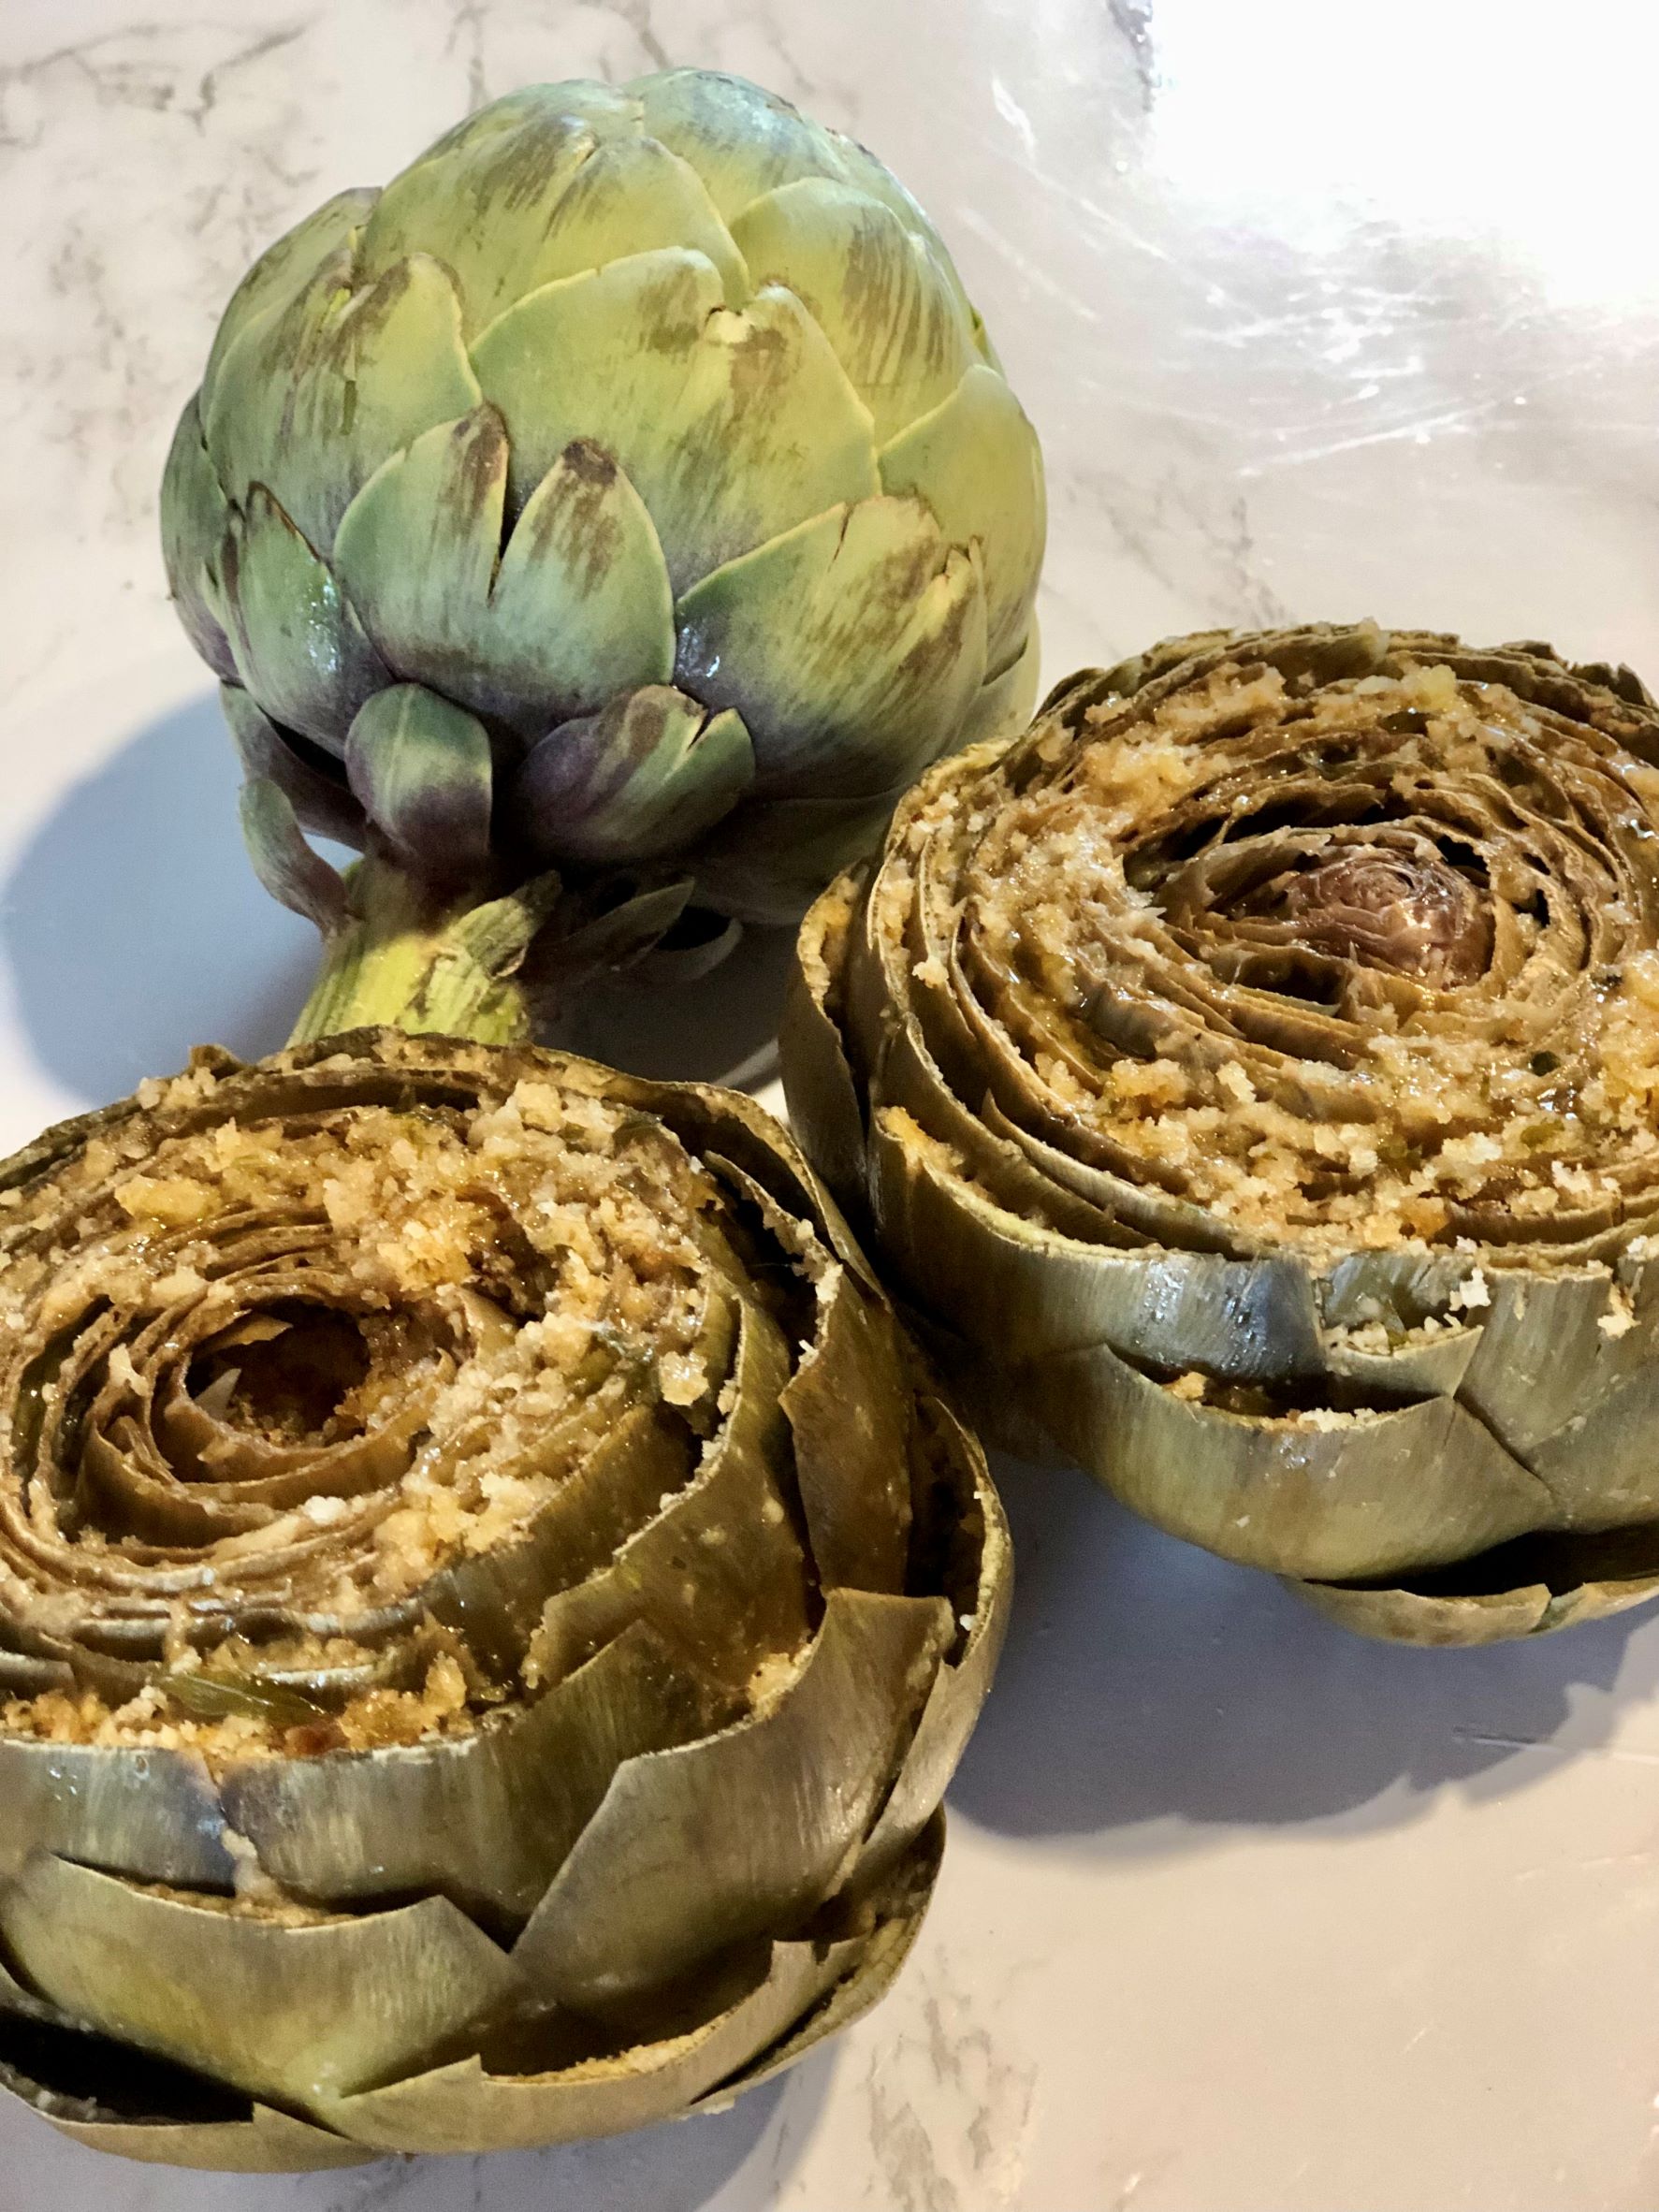
Italian Stuffed Artichokes

Stuffed artichokes are the perfect appetizer to have set out as your guests arrive and you are still preparing the main course (my favorite – spaghetti with homemade pasta sauce). It will not only decorate the table, your guests will be impressed with the flavor of the artichokes and delicious bread crumbs.

Ingredients

Instructions

  1. Fill a large pot or bowl with cold water. Squeeze the juice of 1 lemon and drop in the lemon halves
  2. Cut the stems from the artichokes to leave a flat base. Lay the artichoke on its side and cut away one inch across the top. Remove any loose leaves around the stem and, using kitchen shears, cut off the prickly tips of each remaining leaf.
  3. Spread and loosen leaves to make stuffing easier. Put trimmed artichokes in the pot of lemon water. This will keep them from discoloring.
  4. Use a spoon to fill between each leaf with the bread crumb mixture.
  5. Place the stuffed artichokes in large kettle side-by-side. Carefully pour in enough water to come up to one inch in the bottom of the pot.
  6. Drizzle olive oil over the artichoke tops. Bring to boil. Reduce heat, cover and simmer slowly until artichokes are tender, an hour or more. (Tug on a bottom leaf. If it’s loose and removes easily, the artichokes are done.
  7. Remove artichokes and serve warm or at room temperature.

Italian Stuffed Artichokes

Stuffed artichokes are the perfect appetizer to have set out as your guests arrive and you are still preparing the main course (my favorite – spaghetti with homemade pasta sauce). It will not only decorate the table, your guests will be impressed with the flavor of the artichokes and delicious bread crumbs.
Prep Time 20 minutes
Cook Time 1 hour
Course Appetizer
Cuisine Italian
Servings 4 people

Instructions
 

  • Fill a large pot or bowl with cold water. Squeeze the juice of 1 lemon and drop in the lemon halves
  • Cut the stems from the artichokes to leave a flat base. Lay the artichoke on its side and cut away one inch across the top. Remove any loose leaves around the stem and, using kitchen shears, cut off the prickly tips of each remaining leaf.
  • Spread and loosen leaves to make stuffing easier. Put trimmed artichokes in the pot of lemon water. This will keep them from discoloring.
  • Use a spoon to fill between each leaf with the bread crumb mixture.
  • Place the stuffed artichokes in large kettle side-by-side. Carefully pour in enough water to come up to one inch in the bottom of the pot.
  • Drizzle olive oil over the artichoke tops. Bring to boil. Reduce heat, cover and simmer slowly until artichokes are tender, an hour or more. (Tug on a bottom leaf. If it’s loose and removes easily, the artichokes are done.
  • Remove artichokes and serve warm or at room temperature.
Keyword Appetizer